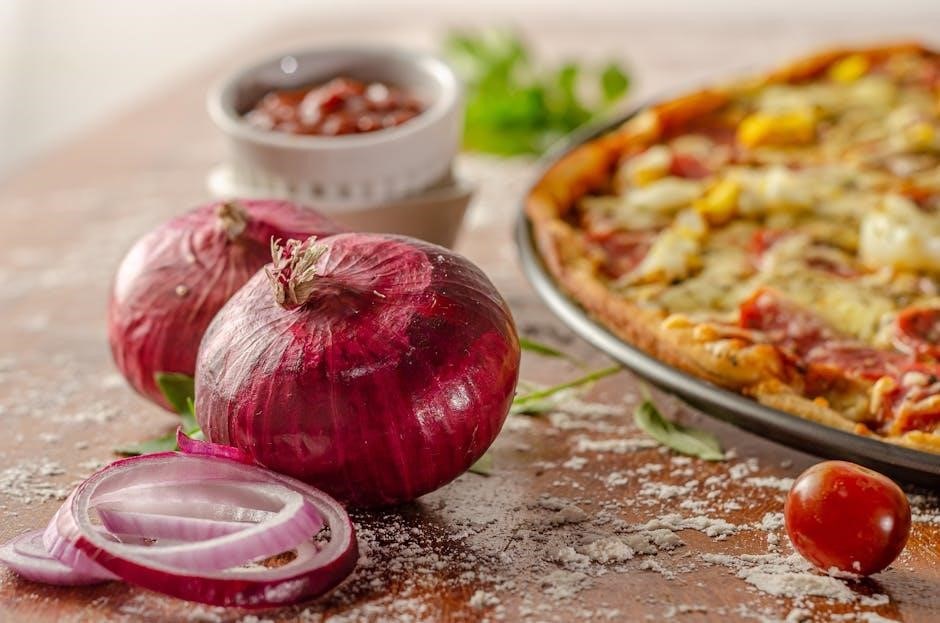
Whole Foods pizza dough offers convenience and quality, allowing for homemade pizza experiences. Pre-proofed and ready to use, it simplifies the cooking process for delicious results.
Many enjoy its versatility, easily adapting to various toppings and baking methods, from traditional ovens to pizza steels.
This dough delivers a fantastic base for creating restaurant-quality pizzas in the comfort of your own kitchen, quickly and efficiently.
What Makes Whole Foods Dough Special?
Whole Foods pizza dough distinguishes itself through a commitment to quality ingredients and a focus on simplicity. Unlike some pre-made options, it avoids artificial preservatives and unnecessary additives, appealing to health-conscious consumers.
The dough’s texture is often praised for its pliability, making it easier to stretch and shape into desired pizza forms. This characteristic stems from a careful balance of flour, water, yeast, and a touch of olive oil.
Furthermore, its pre-proofed nature saves valuable time in the kitchen, eliminating the need for lengthy rising periods. This convenience, combined with its consistent quality, makes Whole Foods dough a popular choice for both novice and experienced pizza makers seeking a reliable base for their culinary creations.
Understanding the Ingredients
Whole Foods pizza dough typically comprises a short list of fundamental ingredients: flour, water, yeast, olive oil, and salt. The flour provides structure, while water hydrates the gluten, enabling elasticity. Yeast is the leavening agent, creating air pockets for a light and airy crust.
Olive oil contributes to flavor and tenderness, and salt enhances the overall taste while controlling yeast activity. The specific type of flour used can vary, influencing the dough’s texture and final product.
Understanding these core components allows for informed adjustments and customizations, such as incorporating whole wheat flour or experimenting with different hydration levels to achieve a personalized pizza experience. The simplicity of the ingredient list is a key aspect of its appeal.

Preparing the Dough for Cooking
Proper preparation is key! Allow the dough to reach room temperature, lightly flour your work surface, and gently stretch it into your desired pizza shape.
Bringing the Dough to Room Temperature
Allowing the Whole Foods pizza dough to come to room temperature is a crucial step for optimal stretching and baking. Removing the dough from the refrigerator approximately 30-60 minutes before use allows the gluten to relax, making it significantly easier to work with.
Cold dough will resist stretching and may tear, resulting in an uneven crust. Gently place the dough on a lightly floured surface, cover it loosely with plastic wrap, and let it sit; This process ensures a more pliable and manageable dough, leading to a beautifully formed pizza base. Patience during this stage is rewarded with a superior final product!
Flouring the Surface
Adequately flouring your work surface is essential when handling Whole Foods pizza dough to prevent sticking and ensure smooth manipulation. A generous dusting of flour – semolina flour works exceptionally well, but all-purpose is suitable – creates a barrier between the dough and the counter.
Use enough flour to prevent the dough from adhering, but avoid overdoing it, as excess flour can dry out the dough. Gently spread the flour evenly across the surface, and periodically add more as needed during stretching. This simple step guarantees a frustration-free pizza-making experience and a perfectly formed crust.
Stretching and Shaping the Dough
Gently stretch the Whole Foods pizza dough, avoiding the use of a rolling pin, which can compress the air bubbles and result in a dense crust. Begin by pressing the dough into a flat disc, then use your fingertips to gradually push and stretch it outwards, working from the center.
Lift and rotate the dough, allowing gravity to assist in the stretching process. Aim for a roughly circular shape, leaving a slightly thicker edge for the crust. Handle the dough with care to maintain its elasticity and create a light, airy texture.

Cooking Methods: Oven Techniques
Oven techniques are crucial for achieving a perfectly cooked Whole Foods pizza. Preheat to 500°F, utilizing a pizza stone or baking steel for optimal heat retention.
High temperatures create a crispy crust and bubbly, golden-brown toppings, mimicking a traditional pizzeria experience.
Using a Pizza Stone
Pizza stones are excellent for achieving a crispy crust with Whole Foods dough. Place the stone in a cold oven and preheat to the highest temperature, ideally 500°F or higher, for at least one hour.
This extended preheating ensures the stone is thoroughly heated, providing intense bottom heat for a beautifully browned crust. Carefully transfer the stretched dough onto a floured pizza peel.
Quickly slide the pizza from the peel onto the hot stone. Bake for 8-12 minutes, or until the crust is golden brown and the cheese is melted and bubbly. Using a pizza stone mimics the effect of a professional pizza oven, delivering superior results.
Remember to use caution when handling the hot stone!
Utilizing a Baking Steel
Baking steel offers even greater heat retention than a pizza stone, resulting in an exceptionally crispy crust when using Whole Foods pizza dough. Preheat the steel in a cold oven at 500°F+ for a full hour, positioned on the top rack.
The steel’s thermal conductivity creates intense bottom heat, crucial for achieving a professional-quality pizza. Dust your pizza peel generously with flour or semolina to prevent sticking.
Transfer the stretched dough onto the peel and quickly slide it onto the preheated steel. Bake for approximately 6-10 minutes, monitoring closely for desired browning. A baking steel delivers a superior crust compared to traditional baking sheets.
Exercise extreme caution when handling the incredibly hot steel!
High-Temperature Oven Cooking (500°F+)
Achieving a high oven temperature – 500°F or higher – is key to replicating pizzeria-style results with Whole Foods pizza dough. This intense heat rapidly cooks the pizza, creating a beautifully blistered and slightly charred crust.
Preheating the oven for at least 30-60 minutes is essential, regardless of whether you’re using a stone, steel, or baking sheet. Ensure your oven reaches the target temperature before baking.
Baking time will be significantly reduced at these temperatures, typically ranging from 6 to 12 minutes. Monitor the pizza closely to prevent burning, and rotate halfway through for even cooking.
High heat promotes a light, airy, and flavorful crust, maximizing the potential of the dough.
Cooking Methods: Alternative Techniques
Whole Foods dough adapts well to cast iron skillets and grills, offering unique textures. These methods provide crispy crusts and smoky flavors easily.
Experimenting expands your pizza possibilities beyond traditional oven baking, delivering delicious variations.
Cast Iron Skillet Pizza
Utilizing a cast iron skillet creates a remarkably crispy and flavorful pizza crust with Whole Foods dough. Begin by generously oiling the skillet – olive oil works wonderfully – ensuring the dough won’t stick during baking. Gently press the dough into the skillet, working it up the sides to form a slight edge.
Preheat the skillet in the oven at a high temperature, ideally 500°F (260°C), for at least 30 minutes. This ensures even heating and a superior crust. Carefully remove the hot skillet, add your desired toppings, and return it to the oven.
Bake for 12-15 minutes, or until the crust is golden brown and the cheese is bubbly and melted. The cast iron retains heat exceptionally well, resulting in a beautifully browned and textured pizza.
Grilling Pizza Dough
Grilling Whole Foods pizza dough imparts a unique smoky flavor and delightfully charred texture. Lightly oil the grill grates to prevent sticking, and preheat to medium-high heat. Gently stretch the dough and carefully place it directly onto the hot grill. Grill for 2-3 minutes per side, watching closely to avoid burning.
The dough should develop grill marks and become slightly puffed. Remove from the grill and quickly add your toppings to the grilled side. Return the pizza to the grill, close the lid, and cook for another 2-3 minutes, or until the cheese is melted and bubbly.
This method creates a wonderfully crispy crust with a distinct grilled flavor, offering a fun and flavorful alternative to oven baking.

Troubleshooting Common Issues
Common problems with Whole Foods dough include stickiness, toughness, or a soggy crust. Adjust flour, kneading, and cooking temperature for optimal results.
Proper handling and baking techniques will ensure a perfectly crisp and delicious homemade pizza every time.
Dough is Too Sticky
If your Whole Foods pizza dough feels excessively sticky, resist the urge to add copious amounts of flour immediately. A slightly tacky dough is actually desirable for a good crust, but unmanageable stickiness needs addressing.
Begin by lightly flouring your work surface – semolina flour works exceptionally well, preventing sticking without altering the dough’s flavor. Gently work a small amount of flour into the dough itself, kneading minimally.
Over-kneading after adding flour can develop too much gluten, resulting in a tough pizza. Ensure your hands are also lightly floured during stretching. If the stickiness persists, allow the dough to rest for 10-15 minutes; this can help the gluten relax and become more manageable.
Dough is Too Tough
Encountering tough Whole Foods pizza dough often stems from overworking the gluten. While some kneading is essential, excessive manipulation creates a dense, difficult-to-stretch crust. Allow the dough ample time to rest – a longer, slower rise can significantly improve its texture.
Gently coax the dough into shape rather than forcing it. Avoid aggressive stretching or rolling, which further tightens the gluten structure. Lightly flouring the surface helps, but don’t overdo it, as excess flour contributes to toughness.
If the dough remains stubbornly resistant, try gently pressing it outwards from the center, allowing gravity to assist in the stretching process. Patience is key!
Pizza Crust is Soggy
A soggy pizza crust with Whole Foods dough usually indicates insufficient heat or excessive moisture; Ensure your oven is fully preheated, ideally with a pizza stone or baking steel, for at least one hour at the highest temperature setting (500°F+).
Avoid overloading the pizza with wet toppings like fresh mozzarella or tomato sauce. Pre-cooking moisture-rich ingredients can help. Lightly flouring the pizza peel before transferring the dough prevents sticking and ensures a crispier base.
If using a baking sheet, avoid using parchment paper, as it can trap steam. A hot surface is crucial for achieving a golden-brown, crispy crust.

Topping and Flavor Combinations
Whole Foods dough is a blank canvas! Explore classic Margherita, or venture into gourmet territory with unique cheeses, vegetables, and flavorful sauces.
Experiment freely to create your perfect pizza masterpiece, tailored to your individual tastes and preferences.
Classic Margherita Pizza
Creating a classic Margherita pizza with Whole Foods dough is a simple yet incredibly satisfying experience. Begin with a generous spread of high-quality tomato sauce, ensuring it reaches nearly to the edges of the stretched dough.
Next, evenly distribute fresh mozzarella cheese – ideally, fior di latte – across the sauce. Don’t overload it; less is often more for a truly authentic Margherita.
Scatter fresh basil leaves strategically over the cheese, adding a vibrant green color and aromatic freshness. A drizzle of extra virgin olive oil completes the preparation before baking.
Bake at a high temperature (500°F or higher) on a pizza stone or steel until the crust is golden brown and the cheese is bubbly and slightly browned. This typically takes 8-12 minutes. Slice and serve immediately, enjoying the simplicity and elegance of this Italian classic.
Gourmet Topping Ideas
Elevate your Whole Foods pizza dough with sophisticated topping combinations! Consider a fig and prosciutto pizza, featuring sweet fig jam, salty prosciutto, crumbled goat cheese, and a balsamic glaze drizzle.
For a bolder flavor, try a roasted butternut squash and sage pizza, incorporating caramelized onions and a sprinkle of Parmesan cheese. Another option is a spicy soppressata and honey pizza, balancing heat with sweetness.
Don’t forget gourmet mushrooms – truffle oil-infused varieties pair beautifully with fontina cheese and fresh thyme. Experiment with pesto, artichoke hearts, and sun-dried tomatoes for a Mediterranean twist.
Remember to use high-quality ingredients and avoid overloading the dough to maintain a crispy crust and balanced flavors.

Storage and Leftovers
Unused Whole Foods dough should be refrigerated promptly. Leftover pizza is best enjoyed cold or reheated in a skillet for a crispy base.
Storing Uncooked Dough
Proper storage is crucial for maintaining the quality of your Whole Foods pizza dough. If you don’t plan to use the entire package immediately, ensure airtight sealing is prioritized.
Wrap the unused portion tightly in plastic wrap, then place it inside a resealable plastic bag. This double-layer protection minimizes air exposure, preventing drying and potential freezer burn.
Refrigerated, the dough can reliably last for up to five days; For longer preservation, consider freezing. Divide the dough into individual portions before freezing for convenient thawing. Frozen dough can maintain quality for up to two months.
Before using frozen dough, allow it to thaw slowly in the refrigerator overnight for optimal texture and ease of handling.
Refrigerating Leftover Pizza
Refrigerating leftover pizza made with Whole Foods dough is a simple way to enjoy it later. Allow the pizza to cool completely to room temperature before storing. This prevents condensation buildup, which can lead to a soggy crust.
Once cooled, transfer the slices to an airtight container or wrap them tightly in plastic wrap or aluminum foil. Proper sealing maintains freshness and prevents the pizza from absorbing odors from the refrigerator.
Refrigerated pizza will generally stay good for up to three to four days. To reheat, consider using a skillet on the stovetop for a crispy crust or the oven for even heating.
Avoid microwaving for extended periods, as this can make the crust rubbery.

Recipe Variations
Explore diverse flavors! Try Whole Wheat dough for a nutty taste or Gluten-Free options for dietary needs, expanding your pizza possibilities.
Experiment with herbs and spices within the dough itself for unique profiles.
Whole Wheat Pizza Dough
Embrace a healthier twist! While Whole Foods doesn’t consistently offer pre-made whole wheat pizza dough, you can easily adapt a standard recipe using whole wheat flour.
Substitute up to 50% of the all-purpose flour with whole wheat for a nuttier flavor and increased fiber. Be mindful that whole wheat absorbs more liquid, so you might need to add a tablespoon or two of water.
The dough may be slightly denser, requiring a bit more effort when stretching. Preheating your baking steel or pizza stone is crucial for a crispy crust, as whole wheat dough tends to be softer. Adjust cooking time slightly, checking for a golden-brown color and firm texture.
Pair this wholesome dough with robust toppings like roasted vegetables, Italian sausage, or earthy mushrooms for a satisfying meal.
Gluten-Free Pizza Dough Options

Whole Foods provides several gluten-free pizza dough options, catering to dietary needs without sacrificing flavor. These pre-made doughs often utilize a blend of rice flour, tapioca starch, and potato starch for a texture resembling traditional dough.
Gluten-free doughs can be more delicate, so handle with care when stretching and transferring to your baking surface. A well-seasoned pizza stone or parchment paper is recommended to prevent sticking.
Baking times may vary, so closely monitor the crust for golden-brown edges and a firm base. Consider pre-baking the crust for a few minutes before adding toppings to ensure it doesn’t become soggy.
Experiment with flavorful sauces and toppings to complement the unique taste of gluten-free pizza!
Resources and Further Reading
Whole Foods offers detailed information online, while pizza-making communities provide valuable tips and tricks for perfecting your dough and baking techniques.
Whole Foods Market Pizza Dough Information
Whole Foods Market provides comprehensive details regarding their pizza dough, often including suggested cooking temperatures and times directly on the packaging. Their website frequently features helpful guides and frequently asked questions addressing common concerns about handling and baking the dough.
Information typically emphasizes preheating your oven to a high temperature, ideally 500°F (260°C), and utilizing a pizza stone or baking steel for optimal crust crispness. They recommend allowing the dough to come to room temperature before stretching, and suggest dividing the dough for individual pizzas.
Furthermore, Whole Foods often shares customer-submitted recipes and topping ideas, fostering a community around their pizza dough product and inspiring creative culinary endeavors. Checking their in-store bakery section or online resources is a great starting point.
Online Pizza Making Communities
Online pizza forums and social media groups are invaluable resources for Whole Foods dough users. Enthusiasts frequently share tips on achieving the perfect crust, including optimal preheating times for pizza steels and stones, often exceeding one hour at 500°F+.
Discussions often revolve around flouring techniques to prevent sticking, stretching methods for even thickness, and creative topping combinations. Many users detail their experiences with different oven setups and adjustments needed for consistent results.
These communities provide a platform for troubleshooting common issues like sticky or tough dough, and offer inspiration for recipe variations. Searching for “Whole Foods pizza dough” within these groups yields a wealth of practical advice and shared experiences.