
Manual to Automatic Transmission Conversion: A Comprehensive Plan
Embarking on a manual to automatic transmission conversion requires careful planning and execution. This guide details the process, acknowledging the shift in the automotive landscape and increasing driver convenience.
The conversion from a manual to an automatic transmission is a significant undertaking, often considered by drivers seeking enhanced convenience or increased vehicle appeal. While manual transmissions once dominated the automotive world, automatics now reign supreme, particularly in North American markets. This shift reflects a growing demand for ease of driving and reduced driver fatigue, as highlighted by recent automotive journalism.
This comprehensive plan aims to guide enthusiasts and owners through every stage of this complex process. We’ll explore the benefits, assess vehicle compatibility, detail required parts, and outline a step-by-step conversion procedure. Understanding the nuances of both transmission types is crucial, alongside acknowledging potential challenges and associated costs. Whether you’re a seasoned mechanic or a determined DIYer, this guide provides the knowledge needed to successfully transform your vehicle.
II. Understanding the Differences: Manual vs. Automatic
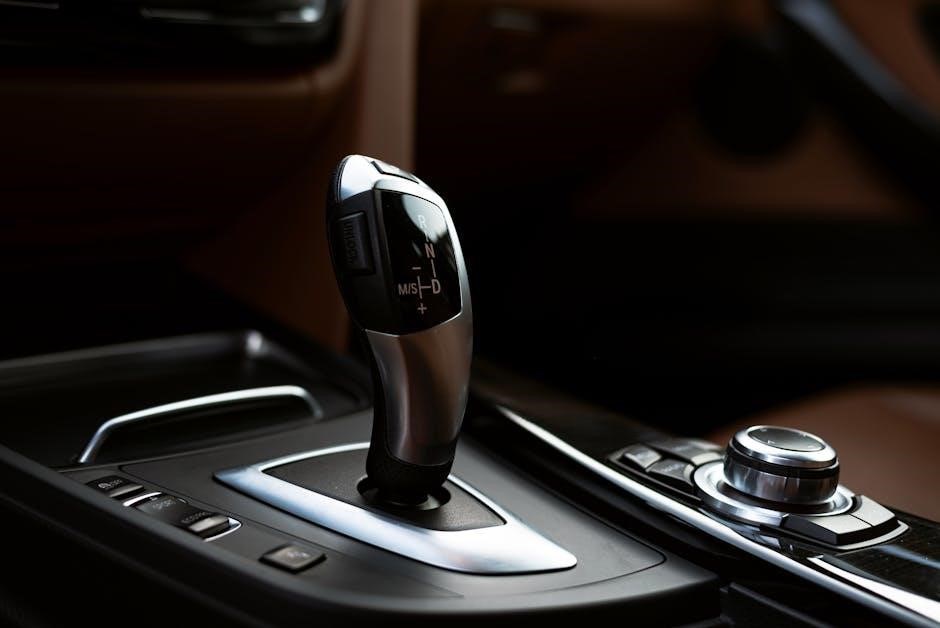
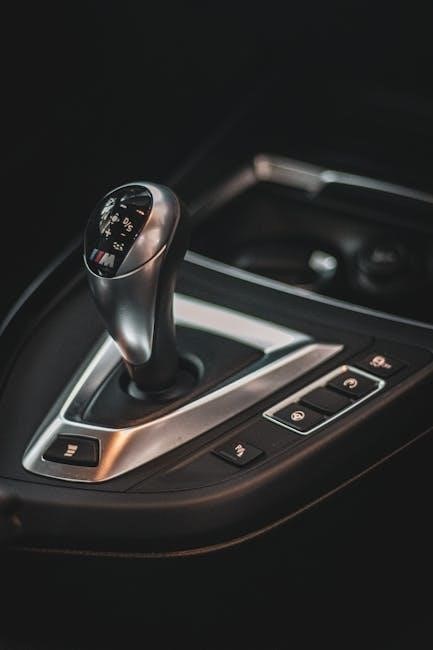
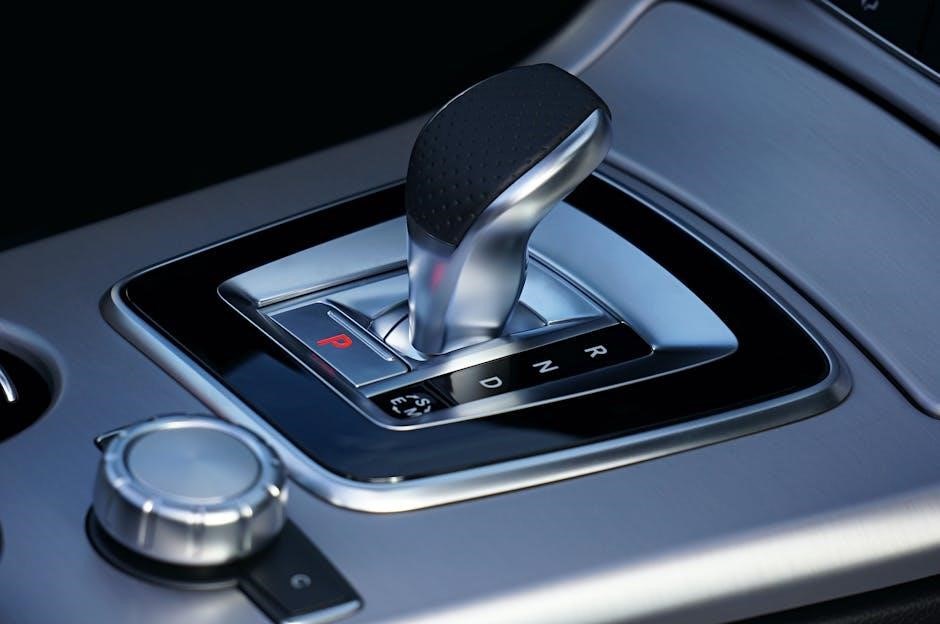
Fundamentally, manual transmissions require the driver to manually select gears using a clutch pedal and shift lever, directly controlling the engine’s power delivery. Automatic transmissions, conversely, handle gear changes autonomously, utilizing a torque converter and planetary gearsets. This difference impacts driving experience significantly; manuals offer greater driver engagement and control, while automatics prioritize convenience.
Automatics, though often perceived as less efficient, have evolved considerably. Modern automatics boast numerous gears and sophisticated control systems, sometimes matching or even exceeding manual transmission efficiency. However, the core distinction remains: a manual demands active participation, while an automatic operates with minimal driver input. Recognizing these differences is vital before undertaking a conversion, as it influences the overall driving dynamic post-modification.
III. Why Convert? Benefits of an Automatic Transmission
Converting from a manual to an automatic transmission offers several compelling advantages. Primarily, it significantly enhances driving ease, particularly in congested traffic, reducing driver fatigue associated with constant clutch engagement and gear shifting. This accessibility broadens the vehicle’s appeal to a wider range of drivers, including those less comfortable with manual operation.
Furthermore, in certain markets, vehicles equipped with automatic transmissions command a higher resale value due to increased demand. While a manual might appeal to enthusiasts, the broader consumer base often prefers the simplicity of an automatic. Ultimately, the decision hinges on individual needs and priorities, but the convenience and potential market benefits make conversion a worthwhile consideration.
III.A. Ease of Driving & Reduced Driver Fatigue
The most immediate benefit of switching to an automatic transmission is a dramatically simplified driving experience. Eliminating the need for constant clutch operation and gear selection significantly reduces mental and physical workload, especially during stop-and-go traffic or long commutes. This translates directly into reduced driver fatigue, allowing for greater concentration and overall comfort.
For drivers accustomed to manual transmissions, the initial adjustment may take time, but the ease of operation quickly becomes apparent. Automatic transmissions handle gear changes seamlessly, freeing the driver to focus on steering and road awareness. This is particularly advantageous for those with physical limitations or simply seeking a more relaxed driving experience.
III;B. Increased Resale Value (in some markets)
While not universally true, converting to an automatic transmission can potentially increase a vehicle’s resale value in specific markets. Particularly in North America, where automatic transmissions dominate the used car landscape, demand for manual vehicles is dwindling. Consequently, a vehicle equipped with an automatic may appeal to a broader range of buyers, leading to a quicker sale and potentially a higher price.
However, this isn’t a guaranteed outcome. Enthusiast markets or regions with a strong preference for manual transmissions might see a decrease in value. Thorough market research is crucial to determine local demand before undertaking the conversion, ensuring a positive return on investment.
III.C. Accessibility for a Wider Range of Drivers
A significant benefit of converting to an automatic transmission is increased accessibility for a broader spectrum of drivers. Individuals who struggle with operating a clutch pedal – due to physical limitations, age, or simply a lack of experience – may find an automatic transmission significantly easier and more comfortable to drive. This opens up the vehicle to family members, friends, or potential buyers who might otherwise be unable to operate a manual.
Furthermore, automatic transmissions reduce the cognitive load on the driver, making for a less stressful driving experience, especially in heavy traffic. This enhanced accessibility expands the vehicle’s usability and potential ownership base.
IV. Vehicle Compatibility Assessment
Before initiating a manual to automatic conversion, a thorough vehicle compatibility assessment is crucial. Not all vehicles are equally suited for this modification. Begin by researching model-specific conversion kits; these often streamline the process and ensure proper fitment. Carefully examine chassis and mount compatibility – the automatic transmission may require different mounting points or reinforcement.
Engine compatibility is also paramount, considering torque capacity. The engine’s output must align with the automatic transmission’s specifications. Ignoring these factors can lead to costly errors and compromised performance. A detailed evaluation prevents unforeseen complications during installation.
IV.A. Model-Specific Conversion Kits
Utilizing model-specific conversion kits significantly simplifies the manual-to-automatic transmission swap. These kits are engineered for particular vehicle makes and years, ensuring component compatibility and reducing guesswork. They typically include essential parts like the automatic transmission, flexplate, shifter assembly, and necessary hardware.
Kits often feature detailed instructions tailored to the specific vehicle, minimizing installation errors. While generally more expensive than sourcing individual parts, the convenience and reduced risk of incompatibility make them a worthwhile investment. Researching reputable kit manufacturers is vital, focusing on quality and customer support. A well-designed kit streamlines the entire conversion process.

IV.B. Chassis and Mount Compatibility
Ensuring chassis and transmission mount compatibility is crucial for a successful conversion. Automatic transmissions often differ in size and mounting points compared to their manual counterparts. Thoroughly investigate whether the automatic transmission physically fits within the vehicle’s transmission tunnel without modification.
Existing transmission mounts may require adaptation or replacement to accommodate the new transmission’s dimensions. Some kits include modified mounts, but independent verification is recommended. Improper fitment can lead to vibration, stress on the chassis, and potential damage. Careful measurement and comparison are essential before proceeding, guaranteeing a secure and stable installation.
IV.C. Engine Compatibility & Torque Considerations
Engine compatibility is paramount; the engine’s torque output must align with the automatic transmission’s specifications. Higher torque engines may necessitate a heavier-duty automatic transmission to prevent premature wear or failure. Verify the transmission’s torque capacity exceeds the engine’s maximum output, including any potential modifications.
Furthermore, the engine’s crankshaft must be compatible with the automatic transmission’s flexplate; Some engines may require adapter plates. Consider the engine’s existing balance and whether the automatic transmission’s rotational inertia will affect it. Addressing these factors ensures optimal performance and longevity of the drivetrain.
V. Parts Required for the Conversion
A successful conversion demands a comprehensive parts list. This includes a complete automatic transmission unit, specifically chosen for engine compatibility and torque handling. A torque converter, matched to both the engine and transmission, is essential for smooth power transfer. Replacing the flywheel with a flexplate is crucial for the torque converter’s function.
You’ll also need a complete shifter assembly with all necessary cables, a transmission cooler and lines to manage heat, and potentially a modified or replacement driveshaft to accommodate length changes. Finally, an ECU/TCU (Transmission Control Unit) and a corresponding wiring harness are vital for controlling the automatic transmission’s operation.
V.A. Automatic Transmission Unit
Selecting the correct automatic transmission is paramount. Consider your vehicle’s engine specifications – horsepower and torque output – to ensure compatibility. Research transmissions designed for similar applications; a direct bolt-in unit simplifies installation, though may be pricier. Rebuilt or used transmissions offer cost savings, but require thorough inspection for wear and potential issues.
Pay attention to the transmission’s gear ratios; they should complement your vehicle’s intended use. A transmission sourced from a similar vehicle model year is often the most straightforward option. Verify the transmission includes all necessary components, like the speed sensor, before purchase.
V.B. Torque Converter
The torque converter is crucial for transferring engine power to the automatic transmission. It must precisely match the chosen transmission; incorrect sizing leads to performance issues and potential damage. Stall speed is a key specification – higher stall speeds are suited for performance applications, while lower speeds prioritize fuel efficiency.
Ensure the torque converter is designed for your engine’s horsepower and torque capabilities. Inspect the converter for any signs of damage, such as cracks or bent fins. A new torque converter is highly recommended, especially with a used transmission, to ensure reliability and optimal performance.
V.C. Flexplate (instead of Flywheel)
Replacing the flywheel with a flexplate is essential. Unlike a flywheel, the flexplate allows for slight torsional flex, crucial for absorbing engine vibrations and protecting the automatic transmission. It also features a ring gear for the starter motor to engage. Selecting the correct flexplate is vital; it must match the engine’s bolt pattern and the torque converter’s mounting configuration.
Inspect the flexplate for cracks or warping before installation. Using a high-quality flexplate ensures durability and proper starter engagement. Proper alignment is critical during installation to prevent vibrations and premature wear on the transmission components.
V.D. Shifter Assembly & Cables
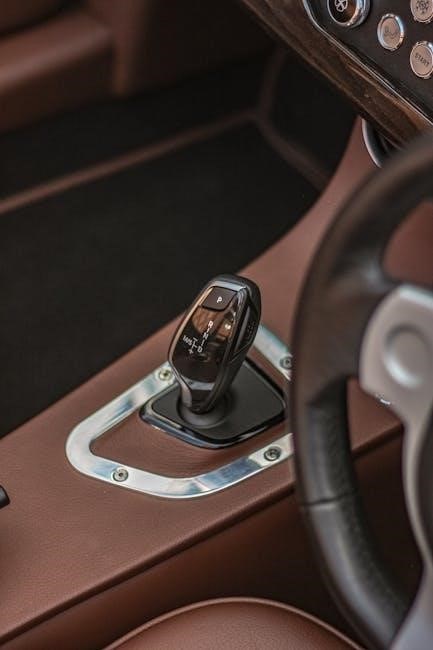
The manual transmission’s shifter assembly must be completely removed and replaced with a compatible automatic transmission shifter. This includes the shifter itself, the shift console trim, and all associated cables or linkages. Ensure the new shifter assembly is designed for your vehicle’s year, make, and model for a proper fit and function.
Carefully route the new shift cables, avoiding any contact with hot exhaust components or sharp edges. Proper adjustment of the shift cables is crucial for accurate gear selection. Verify that each gear position is correctly indicated on the instrument cluster after installation and adjustment.
V.E. Transmission Cooler & Lines
Automatic transmissions generate significant heat, necessitating a dedicated cooling system. A transmission cooler is essential to prevent overheating and ensure longevity. Options include an auxiliary cooler mounted in front of the radiator or a cooler integrated into the radiator itself.
Install new transmission cooler lines, routing them carefully to avoid kinks or damage. Use high-quality, transmission-specific hoses and fittings to prevent leaks. Proper line routing is vital to avoid contact with hot engine components. Thoroughly flush the cooling system after installation to remove any debris and ensure optimal cooling performance.
V.F. Driveshaft Modification/Replacement
The automatic transmission’s length differs from the manual, often requiring driveshaft adjustments or a complete replacement. Measure the difference in length between the original and the new transmission setups. If the difference is minor, a driveshaft shortening or lengthening service might suffice.
However, significant length discrepancies necessitate a new driveshaft. Ensure the replacement driveshaft is properly balanced to prevent vibrations. Verify the U-joints are in good condition and lubricated. Correct driveshaft length is crucial for proper drivetrain operation and preventing damage to the transmission or differential.
V.G; ECU/TCU (Transmission Control Unit) & Wiring Harness
An automatic transmission requires a Transmission Control Unit (TCU) to manage gear shifts. Depending on the vehicle, this might involve a standalone TCU or integration with the existing Engine Control Unit (ECU). A new wiring harness is almost always necessary to connect the TCU to the transmission, sensors, and the vehicle’s electrical system.
Proper wiring and TCU programming are vital for smooth operation. Incorrect wiring can lead to erratic shifting or transmission failure. Professional programming ensures the TCU correctly interprets signals and controls the transmission, optimizing performance and efficiency. Consider potential CAN bus integration challenges.
VI. The Conversion Process: Step-by-Step
The conversion begins with safely disconnecting and removing the manual transmission assembly. Next, install the flexplate, ensuring proper alignment, followed by carefully mounting the automatic transmission into the vehicle’s chassis. Connect the new shifter assembly and associated cables, verifying smooth operation through all gear selections.
Install the transmission cooler and lines, ensuring adequate cooling capacity. Adjust or replace the driveshaft to accommodate the automatic transmission’s length. Finally, wire the ECU/TCU and perform necessary programming. Thorough testing is crucial after each step, verifying functionality and addressing any issues promptly.
VI.A. Disconnecting and Removing the Manual Transmission
Begin by disconnecting the driveshaft, ensuring the vehicle is securely supported. Carefully detach the shift linkage, clutch cable (or hydraulic line), and any wiring connected to the manual transmission. Support the engine from above to prevent strain during removal. Unbolt the transmission from the engine and transmission mount, using appropriate tools.
Slowly lower the manual transmission, taking care to avoid damaging surrounding components. Drain the transmission fluid before complete removal. Inspect the flywheel for wear and tear, as it will be replaced. This step requires patience and attention to detail to avoid complications during the automatic transmission installation.
VI.B. Installing the Flexplate and Torque Converter
With the manual transmission removed, install the flexplate in place of the flywheel. Ensure proper alignment and torque specifications are followed to prevent vibrations. Next, carefully mount the torque converter onto the transmission input shaft, pushing it in until it clicks and seats fully.
Avoid rotating the torque converter excessively before it’s bolted to the flexplate. Align the torque converter and flexplate bolt holes, then securely fasten them together, again adhering to the manufacturer’s torque specifications. Double-check the connection to ensure a solid and stable assembly, crucial for smooth power transfer.
VI.C. Mounting the Automatic Transmission
Carefully lift the automatic transmission into position, aligning it with the engine and transmission mount points. Support the transmission with a jack to ensure proper alignment during installation. Securely bolt the transmission to the engine, using new hardware and adhering strictly to the specified torque values.
Verify the transmission is firmly seated and doesn’t exhibit any wobble. Next, attach the transmission mount to the chassis, ensuring it’s properly aligned and tightened. Double-check all bolts for secureness, as a loose transmission can cause significant damage and safety hazards during operation.
VI.D. Connecting the Shifter Assembly and Cables
Install the automatic transmission shifter assembly within the cabin, ensuring it’s securely mounted to the floor console or transmission tunnel. Connect the shift cables to the transmission’s shift lever, carefully routing them to avoid any obstructions or potential binding points.
Adjust the cable tension according to the manufacturer’s specifications to guarantee precise gear selection. Verify that each gear position (Park, Reverse, Neutral, Drive, etc.) is accurately indicated on the shifter. Thoroughly test the shifter’s operation to confirm smooth and reliable gear changes before proceeding further.
VI.E. Installing the Transmission Cooler and Lines
Mount the automatic transmission cooler in a location with sufficient airflow, typically in front of the radiator. Connect the transmission cooler lines between the transmission and the cooler, ensuring they are securely fastened with appropriate fittings to prevent leaks.
Proper routing of the lines is crucial, avoiding contact with hot exhaust components or moving parts. Fill the transmission with the correct type and amount of automatic transmission fluid (ATF) as specified by the vehicle manufacturer. Double-check all connections for leaks before starting the engine and monitoring fluid levels.
VI.F. Driveshaft Adjustment/Replacement
The automatic transmission’s output shaft length often differs from the manual’s, necessitating driveshaft modification or replacement. Measure the difference in length and determine if shortening the existing driveshaft is feasible, or if a new one is required.
If shortening, ensure it’s done by a professional to maintain balance and prevent vibrations. Replacement driveshafts should be specifically designed for the automatic transmission conversion. Verify proper U-joint angles after installation to minimize drivetrain stress and ensure smooth operation. Thoroughly inspect all driveshaft components for wear or damage before final installation.
VI.G. Wiring the ECU/TCU and Programming
Connecting the Transmission Control Unit (TCU) or integrating it with the Engine Control Unit (ECU) is crucial for automatic transmission function. Carefully follow the wiring diagrams provided with the conversion kit, ensuring all connections are secure and properly insulated.
Programming the ECU/TCU is often required to recognize the new transmission and optimize shift points for your vehicle’s engine and driving style. This may involve using a specialized scan tool or sending the ECU to a tuning shop. Incorrect programming can lead to poor performance or transmission damage, so professional assistance is often recommended.
VII. Potential Challenges and Troubleshooting
Converting from manual to automatic isn’t always seamless; anticipate potential hurdles. Electrical issues are common, particularly with ECU/TCU integration – verify all connections and consider professional programming. Mechanical fitment problems may arise if components aren’t perfectly compatible, requiring adjustments or shimming.
Drivetrain vibration and unusual noises often indicate improper alignment or worn components. Thoroughly inspect the driveshaft, torque converter, and transmission mounts. Addressing these issues promptly prevents further damage. Remember, patience and meticulous attention to detail are key to overcoming these challenges and achieving a successful conversion.
VII.A. Electrical Issues & ECU Programming
Electrical gremlins are frequent during a manual-to-automatic swap. The ECU (Engine Control Unit) and TCU (Transmission Control Unit) must communicate flawlessly; mismatched wiring or incorrect programming can cause shifting problems or even prevent the transmission from engaging. Diagnostic tools are essential for identifying error codes and pinpointing faulty connections.
Ensure the TCU receives the correct signals regarding vehicle speed, throttle position, and brake input. Custom programming may be necessary to optimize shift points and ensure smooth operation. Consider professional tuning if you lack experience, as improper settings can damage the transmission. Thoroughly test all functions post-programming.
VII.B. Mechanical Fitment Problems
Despite using conversion kits, mechanical fitment issues are common. The automatic transmission’s dimensions may differ from the manual, causing clearance problems with the chassis, driveshaft, or exhaust system. Mounts might require modification or replacement to ensure proper alignment and prevent vibrations.
The flexplate, replacing the flywheel, must align perfectly with the crankshaft. Incorrect alignment can lead to premature wear and failure. Carefully check for interference between the transmission and surrounding components during installation. Be prepared to fabricate custom brackets or modify existing ones to achieve a secure and functional fit.
VII.C. Drivetrain Vibration & Noise
Post-conversion, unexpected drivetrain vibrations and noises are frequently reported. These often stem from improper alignment of the transmission, flexplate, or driveshaft. An unbalanced torque converter can also induce noticeable vibrations, particularly at higher speeds. Ensure all mounting points are securely fastened and that the driveshaft is properly balanced.
Investigate any unusual noises – whining, clunking, or humming – as they could indicate internal transmission issues or interference with surrounding components. Thoroughly inspect the exhaust system for contact points. Addressing these issues promptly prevents further damage and ensures a smooth, quiet driving experience.
VIII. Cost Analysis: Budgeting for the Conversion
A manual to automatic transmission conversion represents a significant financial undertaking. Expect costs ranging from $2,000 to $8,000+, depending on the vehicle, transmission type, and labor rates. Core components – the automatic transmission, torque converter, and ECU – constitute the largest expenses. Factor in additional costs for a new flexplate, shifter assembly, transmission cooler, and potentially a modified driveshaft.
DIY installations save on labor, but require specialized tools and expertise. Professional installation adds $800-$2,000+. Contingency funds are crucial for unforeseen issues. Thorough research and obtaining multiple quotes are essential for accurate budgeting.
IX. Professional Installation vs. DIY
Deciding between professional installation and a DIY approach hinges on skill level and available resources. A DIY conversion demands extensive mechanical knowledge, specialized tools (transmission jack, diagnostic scanner), and a dedicated workspace. Electrical wiring and ECU programming present significant challenges for novices.
Professional installation, while more expensive, offers expertise, warranty protection, and ensures proper functionality. Experienced technicians can efficiently handle complex tasks and troubleshoot potential issues. However, costs can escalate quickly. Carefully assess your capabilities and budget before committing to either path. Incorrect installation can lead to costly repairs and safety hazards.
X. Post-Conversion Maintenance
Following the conversion, diligent maintenance is crucial for long-term reliability. Regularly check the automatic transmission fluid (ATF) level and condition, adhering to the manufacturer’s recommended intervals for fluid changes. Inspect transmission cooler lines for leaks or damage. Monitor for any unusual noises or vibrations during operation.
Pay close attention to the ECU/TCU programming, ensuring it’s functioning optimally. Periodic diagnostic scans can identify potential issues early on. Proper maintenance extends the lifespan of the new transmission and ensures smooth, efficient performance. Don’t neglect routine vehicle maintenance alongside transmission-specific checks.