
Andersen 100 Series Sliding Door Installation: A Comprehensive Guide
This guide details the Andersen 100 Series sliding door installation process, covering preparation, sealing, shimming, and fastening.
Proper execution ensures optimal performance and energy efficiency.
Consult Andersen resources for complete instructions and safety information.
Welcome to a detailed exploration of Andersen 100 Series sliding door installation! This guide is designed to empower both DIY enthusiasts and professional installers with the knowledge needed for a successful and lasting result. Installing a sliding door requires careful attention to detail, ensuring not only aesthetic appeal but also optimal functionality and energy efficiency.
The Andersen 100 Series offers a blend of beauty and performance, but realizing its full potential hinges on correct installation. This process encompasses several crucial steps, beginning with meticulous preparation of the rough opening and extending to precise sealing and fastening techniques. We’ll navigate through removing components like insect screens, achieving proper alignment, and strategically applying shims for a perfectly plumb and level fit.
Throughout this guide, we’ll emphasize the importance of referencing the configured installation guide specific to your product, as it contains vital safety information. Andersen provides comprehensive resources, and connecting with an Andersen representative or local contractor can further streamline your project. Remember, proper installation is paramount for long-term performance and operational smoothness.
Tools and Materials Required
Successful Andersen 100 Series sliding door installation demands a specific toolkit and material list. Essential tools include a level (4ft and smaller), measuring tape, caulk gun, utility knife, drill with appropriate bits, and a hammer. Safety gear such as gloves and eye protection are also crucial.
Beyond tools, gather necessary materials. High-quality exterior-grade sealant is paramount, alongside low-expanding foam (specifically mentioned for filling cavities around the door frame). Shims – both wood and composite – are needed for precise alignment. Fasteners, typically screws appropriate for the frame material and rough opening, must be readily available.
Don’t forget flashing tape for weatherproofing, and potentially backer rod to accompany the sealant. Depending on the installation, you might require additional lumber for creating a suitable sub-sill. Always consult the Andersen installation guide for your specific model, as it will detail any unique material requirements. Having everything prepared beforehand ensures a smooth and efficient installation process, minimizing delays and maximizing results.
Preparing the Rough Opening
Proper rough opening preparation is fundamental for a successful Andersen 100 Series sliding door installation. Begin by meticulously verifying the opening’s dimensions against the door unit’s specifications – accuracy is key. Ensure the opening is plumb, level, and square. Any discrepancies must be corrected before proceeding.
Remove any debris, old nails, or obstructions from the rough opening. Inspect the sill for rot or damage; repair or replace as needed to provide a solid foundation. A clean and structurally sound opening is vital for proper sealing and weather resistance.
Apply flashing tape to the sill and sides of the opening, creating a watertight barrier. This prevents moisture intrusion and protects the surrounding structure. Pay close attention to corners and overlaps, ensuring a continuous seal. The rough opening should be prepared to receive the door unit without forcing, allowing for shimming adjustments during installation. Refer to Andersen’s specific guide for detailed sill preparation instructions.
Removing Insect Screens and Components
Before installing the Andersen 100 Series sliding door, carefully remove all temporary shipping components and insect screens. These elements are not intended for permanent installation and can hinder proper alignment and sealing.
Begin by detaching the insect screens from the door unit. Typically, they are held in place by clips or retainers; gently release these to remove the screens. Inspect the door for any temporary packing materials or bracing used during shipping. These should be removed to allow the door to function freely within the frame.
Pay attention to any small plastic or cardboard pieces that may have been used to protect the rollers or tracks. These are often overlooked but are crucial to remove. If temporary panels are present, carefully extract them, noting their placement in case future removal is needed. Andersen’s installation guides may mention specific components to remove, so always consult the documentation for your particular model.
Initial Door Placement and Alignment
Carefully lift the Andersen 100 Series sliding door into the prepared rough opening. Ensure the door is centered within the frame, leaving equal space on both sides. Avoid dragging the door across the sill to prevent damage to the finish or weatherstripping.
Once positioned, check for initial alignment. The door should move smoothly within the tracks without binding or excessive resistance. Observe the vertical and horizontal alignment – the door panel should be plumb and level; Minor adjustments can be made at this stage before securing the frame.
Inspect the rollers to ensure they are properly seated in the tracks. If the door doesn’t glide easily, gently lift and reposition it, confirming the rollers are fully engaged. This initial placement is critical for the door’s long-term operation, so take the time to verify proper alignment before proceeding to shimming and fastening.
Shimming the Door Frame
After initial placement, shimming is crucial for a square, plumb, and level installation. Begin by inserting shims between the door frame and the rough opening at multiple points – corners, mid-frame locations, and near fastener points. Use composite shims, as they resist rot and maintain stability.

Focus on achieving consistent gaps around the entire frame. Start with the corners, ensuring they are square. Then, address any areas where the frame bows inward or outward. Regularly check for plumb using a level, adjusting shims as needed. Avoid over-shimming, which can distort the frame.
Shim behind all locking and strike hardware locations to provide solid support. Once the frame is properly aligned and shimmed, carefully score the shims flush with the wall surface. This creates a stable base for secure fastening and ensures the door operates smoothly for years to come.
Fastening the Door Frame
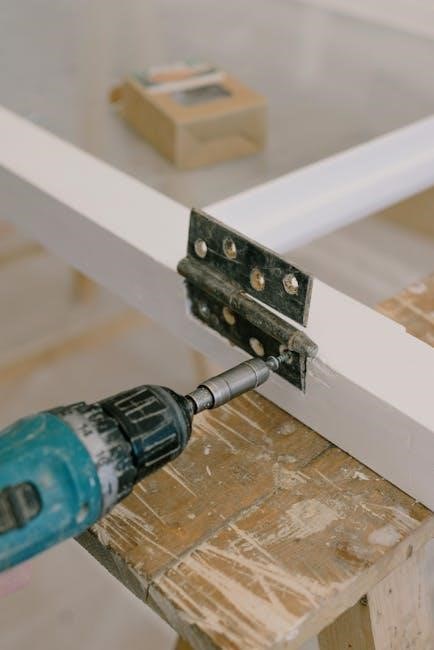
With the frame properly shimmed, secure it to the rough opening using appropriate fasteners. Andersen recommends using screws specifically designed for door and window installation – typically, these are corrosion-resistant and provide strong holding power. Drive fasteners through the frame and into the wall framing, ensuring they penetrate sufficiently into solid wood.
Follow the manufacturer’s recommended fastener spacing, typically 12-16 inches apart. Start with the corners, then proceed along the sides and top of the frame. Avoid over-tightening the screws, as this can distort the frame or strip the screw holes. Ensure the screw heads are flush with the frame surface.
Pay close attention to fastener placement near shims, driving screws through the frame and into the shims for added stability. Regularly check for plumb and square during the fastening process, making minor adjustments to shims if necessary. A securely fastened frame is essential for long-term performance and weather resistance.
Sealing the Door Frame – Interior

Begin the interior sealing process by applying a continuous bead of high-quality sealant around the entire perimeter of the door frame where it meets the interior wall. This creates an airtight and watertight barrier, preventing drafts and moisture intrusion. Focus on filling the cavity approximately one-third full, as recommended by Andersen.
Utilize low-expanding foam or backer rod in conjunction with sealant to effectively fill larger gaps and prevent excessive foam expansion that could bow the frame. Smooth the sealant bead with a wet finger or a sealant smoothing tool for a professional finish. Ensure complete coverage, paying attention to corners and intersections.
Proper interior sealing is crucial for energy efficiency and comfort. It minimizes air leakage and helps maintain a consistent indoor temperature. Inspect the sealant bead after application, adding more if needed to ensure a continuous, watertight seal. This step is vital for optimal door performance and longevity.

Sealing the Door Frame – Exterior & Flashing
Exterior sealing and proper flashing are paramount for preventing water damage and ensuring long-term durability. Begin by applying a generous bead of exterior-grade sealant around the entire perimeter of the door frame where it meets the exterior wall sheathing.
Install flashing above the door opening, overlapping the sheathing and extending down the sides, to direct water away from the frame. Ensure the flashing is properly integrated with the weather-resistant barrier (WRB) of the wall. Use compatible sealant to seal all flashing overlaps and penetrations.

Pay close attention to the sill area, ensuring proper slope for water runoff and a watertight seal between the sill and the threshold. Inspect all sealant applications for gaps or inconsistencies, addressing them promptly. This meticulous approach safeguards against moisture intrusion and maintains the integrity of the installation. Andersen’s guides detail specific flashing requirements for various wall types.
Water Management Considerations
Effective water management is crucial for a successful Andersen 100 Series sliding door installation. Beyond flashing, consider the overall drainage plane of the wall system. Ensure the sill slopes adequately to channel water outwards, preventing pooling and potential leaks.
Properly integrate the weather-resistant barrier (WRB) with the flashing and sealant, creating a continuous barrier against moisture. Pay attention to the details around any penetrations in the WRB, sealing them meticulously. Inspect the rough opening for any potential water entry points and address them proactively.

Andersen recommends continuous sealant application around the perimeter of the opening, filling the interior third of the cavity with low-expanding foam or backer rod before sealing. This creates a robust barrier. Remember, a well-sealed and properly flashed installation prevents water damage and preserves the door’s performance and longevity. Refer to Andersen’s installation guides for specific recommendations based on your climate and wall construction.
Low Expanding Foam Application
When installing Andersen 100 Series sliding doors, low-expanding foam plays a vital role in sealing gaps and preventing air and water infiltration. It’s particularly important when joining windows or doors, ensuring a tight, yet non-stressful, fit.
Apply the foam continuously around the full perimeter of the rough opening, filling approximately the interior one-third of the cavity. Avoid overfilling, as excessive foam can bow the door or window jambs, leading to operational issues. Use a minimal amount to effectively seal the space.
Alternatively, a backer rod can be used in conjunction with sealant to achieve a similar result. Ensure the foam or backer rod is fully covered by sealant to create a complete moisture barrier. Andersen specifically cautions against using standard expanding foam, as its aggressive expansion can distort the frame. Proper foam application contributes significantly to energy efficiency and long-term performance.

Addressing Temporary Installation Components
During Andersen 100 Series sliding door installation, you may encounter temporary components used for stabilization or alignment. These are often overlooked but crucial to remove once the door is properly set and secured within the rough opening.
Specifically, check for temporary panels or supports placed during initial placement. These aren’t intended for permanent use and can hinder smooth operation if left in place. Carefully remove these components, potentially requiring access by taking out interior panels. If the installation guide doesn’t mention these items, it’s a strong indication they are temporary.
It’s essential to thoroughly inspect the installation area after fastening and sealing. Leaving temporary components in place can cause bowing of the jambs or interfere with the sliding mechanism. Andersen’s installation guides provide detailed instructions, but a final visual check ensures a flawless and functional installation, maximizing the door’s performance and longevity.

Andersen Installation Guides and Resources
Andersen provides comprehensive installation guides tailored to each product, including the 100 Series sliding door. These guides are essential for ensuring correct installation and optimal product performance, covering everything from rough opening preparation to final sealing and adjustments.
Accessing these resources is straightforward. Andersen’s website offers a dedicated section for installation instructions, searchable by product line and model number. These guides include detailed diagrams, step-by-step instructions, and crucial safety information. Always prioritize following the configured installation guide specific to your product.
Beyond the guides, Andersen offers support through representatives and local contractors. They can provide personalized assistance and address specific installation challenges. Utilizing these resources guarantees a professional installation, maximizing energy efficiency, and upholding Andersen’s commitment to quality. Proper installation is key to enjoying years of reliable operation and performance.
Importance of Proper Installation for Performance
Correct installation is paramount to realizing the full benefits of your Andersen 100 Series sliding door. Beyond aesthetics, a properly installed door ensures optimal energy efficiency, preventing drafts and minimizing heating/cooling costs; Precise alignment and secure fastening contribute to smooth operation and longevity, avoiding issues like sticking or difficulty sliding.
Neglecting proper installation can lead to significant problems. Improper sealing allows water infiltration, potentially causing damage to the surrounding structure and fostering mold growth. Incorrect shimming can strain the door frame, leading to warping or operational failures; Andersen emphasizes that proper installation and maintenance are essential for optimum product performance.
Investing time and effort in a meticulous installation, or engaging a qualified contractor, safeguards your investment. It guarantees a weather-tight seal, effortless operation, and years of reliable performance, maximizing the value and enjoyment of your new Andersen sliding door.
Connecting with Andersen Representatives & Contractors
Andersen provides multiple avenues for support throughout your 100 Series sliding door installation journey. For initial guidance and answers to specific questions, connecting with an Andersen representative is highly recommended. They can clarify installation details, explain product features, and offer valuable insights.
However, for the installation itself, Andersen strongly suggests considering a professional contractor, especially if you lack extensive DIY experience. Andersen can assist in locating a local contractor familiar with their products and installation best practices. This ensures the job is completed correctly, adhering to Andersen’s standards and warranty requirements.
Utilizing a qualified installer minimizes the risk of errors, guaranteeing optimal performance, energy efficiency, and long-term durability. Andersen’s website offers resources to help you find certified installers in your area. Don’t hesitate to reach out – Andersen is committed to supporting you from planning to completion, ensuring a successful and satisfying installation experience.
Troubleshooting Common Installation Issues
Even with careful planning, installation challenges can arise. A frequent concern involves temporary installation components – often overlooked, these are not meant to remain permanently. Carefully inspect and remove any such pieces once the door is properly aligned and secured. If unsure, consult the specific installation guide for your product.
Another common issue relates to shimming. Incorrect shimming can lead to operational problems or bowing of the door frame. Ensure shims are strategically placed and properly sized to maintain plumb and level alignment. Pay close attention to water management; improper flashing or sealing can result in leaks.
If you encounter difficulties, revisit the Andersen installation guide for detailed diagrams and troubleshooting steps. Remember, continuous sealant application is crucial, filling approximately one-third of the cavity with low-expanding foam or backer rod. Don’t hesitate to contact Andersen representatives or your contractor for assistance if problems persist – addressing issues promptly prevents further complications.